Step 3: Activity to Fragment
Inflating Widgets
In this step, we'll look at how the widgets from Step 2 were inflated and put on the screen. Then, we'll refactor our SupActivity to use UIFragments.
Open up java/com/uci/android101/sup/SupActivity.java and look at the onCreate() method. This is called when we create an activity. You'll see that this function calls setContentView(), and passes in the R.layout.activity_sup. R.layout.activity_sup is the resource ID for res/layout/activity_sup.xml we were working on earlier.
Activity to Fragment
Why do we refactor? Apps commonly need their UI to be flexible, and using UI Fragments allows just that. A Fragment is a modular piece of an activity, with its own UI, behavior, and lifecycle. You can put multiple fragments in an activity.
There are 5 steps we need to do in order for an activity to use a UI Fragment.
Create a Fragment
First, we want to create a UI by defining widgets in a layout file for the fragment.
Go to app/res/layout in the Project pane in the left. Then right click and select New > Layout resource file. Name this new layout resource file fragment_sup and leave everything else as is. Then copy everything you have in activity_sup.xml into fragment_sup.xml.
Setup the Fragment
Next, we need to create a spot in SupActivity's view hierarchy for the fragment.
Open up res/layouts/activity_sup.xml and replace everything with the following:
<?xml version="1.0" encoding="utf-8"?>
<FrameLayout
	xmlns:android="http://schemas.android.com/apk/res/android"
	android:layout_width="match_parent"
	android:layout_height="match_parent"
	android:orientation="vertical"
	android:id="@+id/fragment_container">
</FrameLayout>
The FrameLayout is a generic container view that can be used to host fragments.
Setup the Activity
Now we create the SupFragment class and set its view, much like what the activity did in its onCreate() method.
Go to /java/com/uci/android101/sup directory in the Project pane and right click and select New > Java Class.
Name the class SupFragment and specify android.support.v4.app.Fragment as its superclass. If it's not there, you'll need to add the library dependency.
Adding a Library Dependency
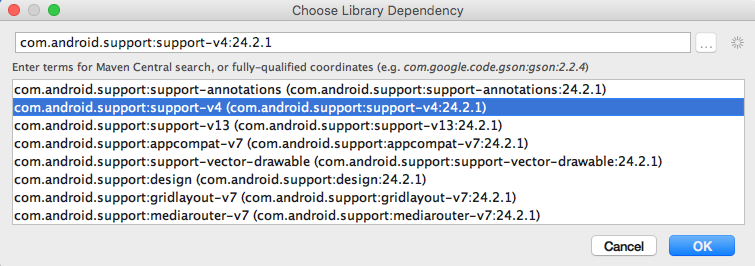
Go to File > Project Structure, then select app under Modules on the left pane. Then select the Dependencies tab and click + at the bottom and choose the Library dependency.

Highlight the com.android.support:support-v4:25.0.0 library and select OK.
The purpose of SupFragment is to let the user select a contact and send "Sup" to that contact. We'll implement that later.
We then set SupFragment's view by overriding onCreateView(...). Autocomplete should help you with that. In this function, add the following:
View v = inflater.inflate(R.layout.fragment_sup, container, false);
return v;
Note: Make sure to include the libraries that are necessary. Generally, Android Studio's autocomplete will allow you to do this. You can also use alt+enter to enter.
Here, we see the LayoutInflater inflater, that inflates the fragment's view. The first parameter is the view's resource ID. The second parameter is the view's parent, which is needed to configure the widgets. The boolean at the end tells the inflater if we want to add the inflated view to the view's parent. We stated false here because we will add the view in the activity later.
Inflating the Widgets
We will now inflate the widgets from fragment_sup.xml. Add these fields to SupFragment.java:
private Button mSelectFriend;
private Button mSendButton;
private TextView mLastSupSent;
Click on the Button text so that Android Studio underlines it. Press alt+enter to import the Button class. Do the same for the TextView class.
For each widget, we will call View.findViewById() to inflate it. Add the following to onCreateView() after inflater.inflate():
mSelectFriend = (Button) v.findViewById(R.id.select_friend);
mSendButton = (Button) v.findViewById(R.id.send_sup);
mLastSupSent = (TextView) v.findViewById(R.id.last_sup_sent);
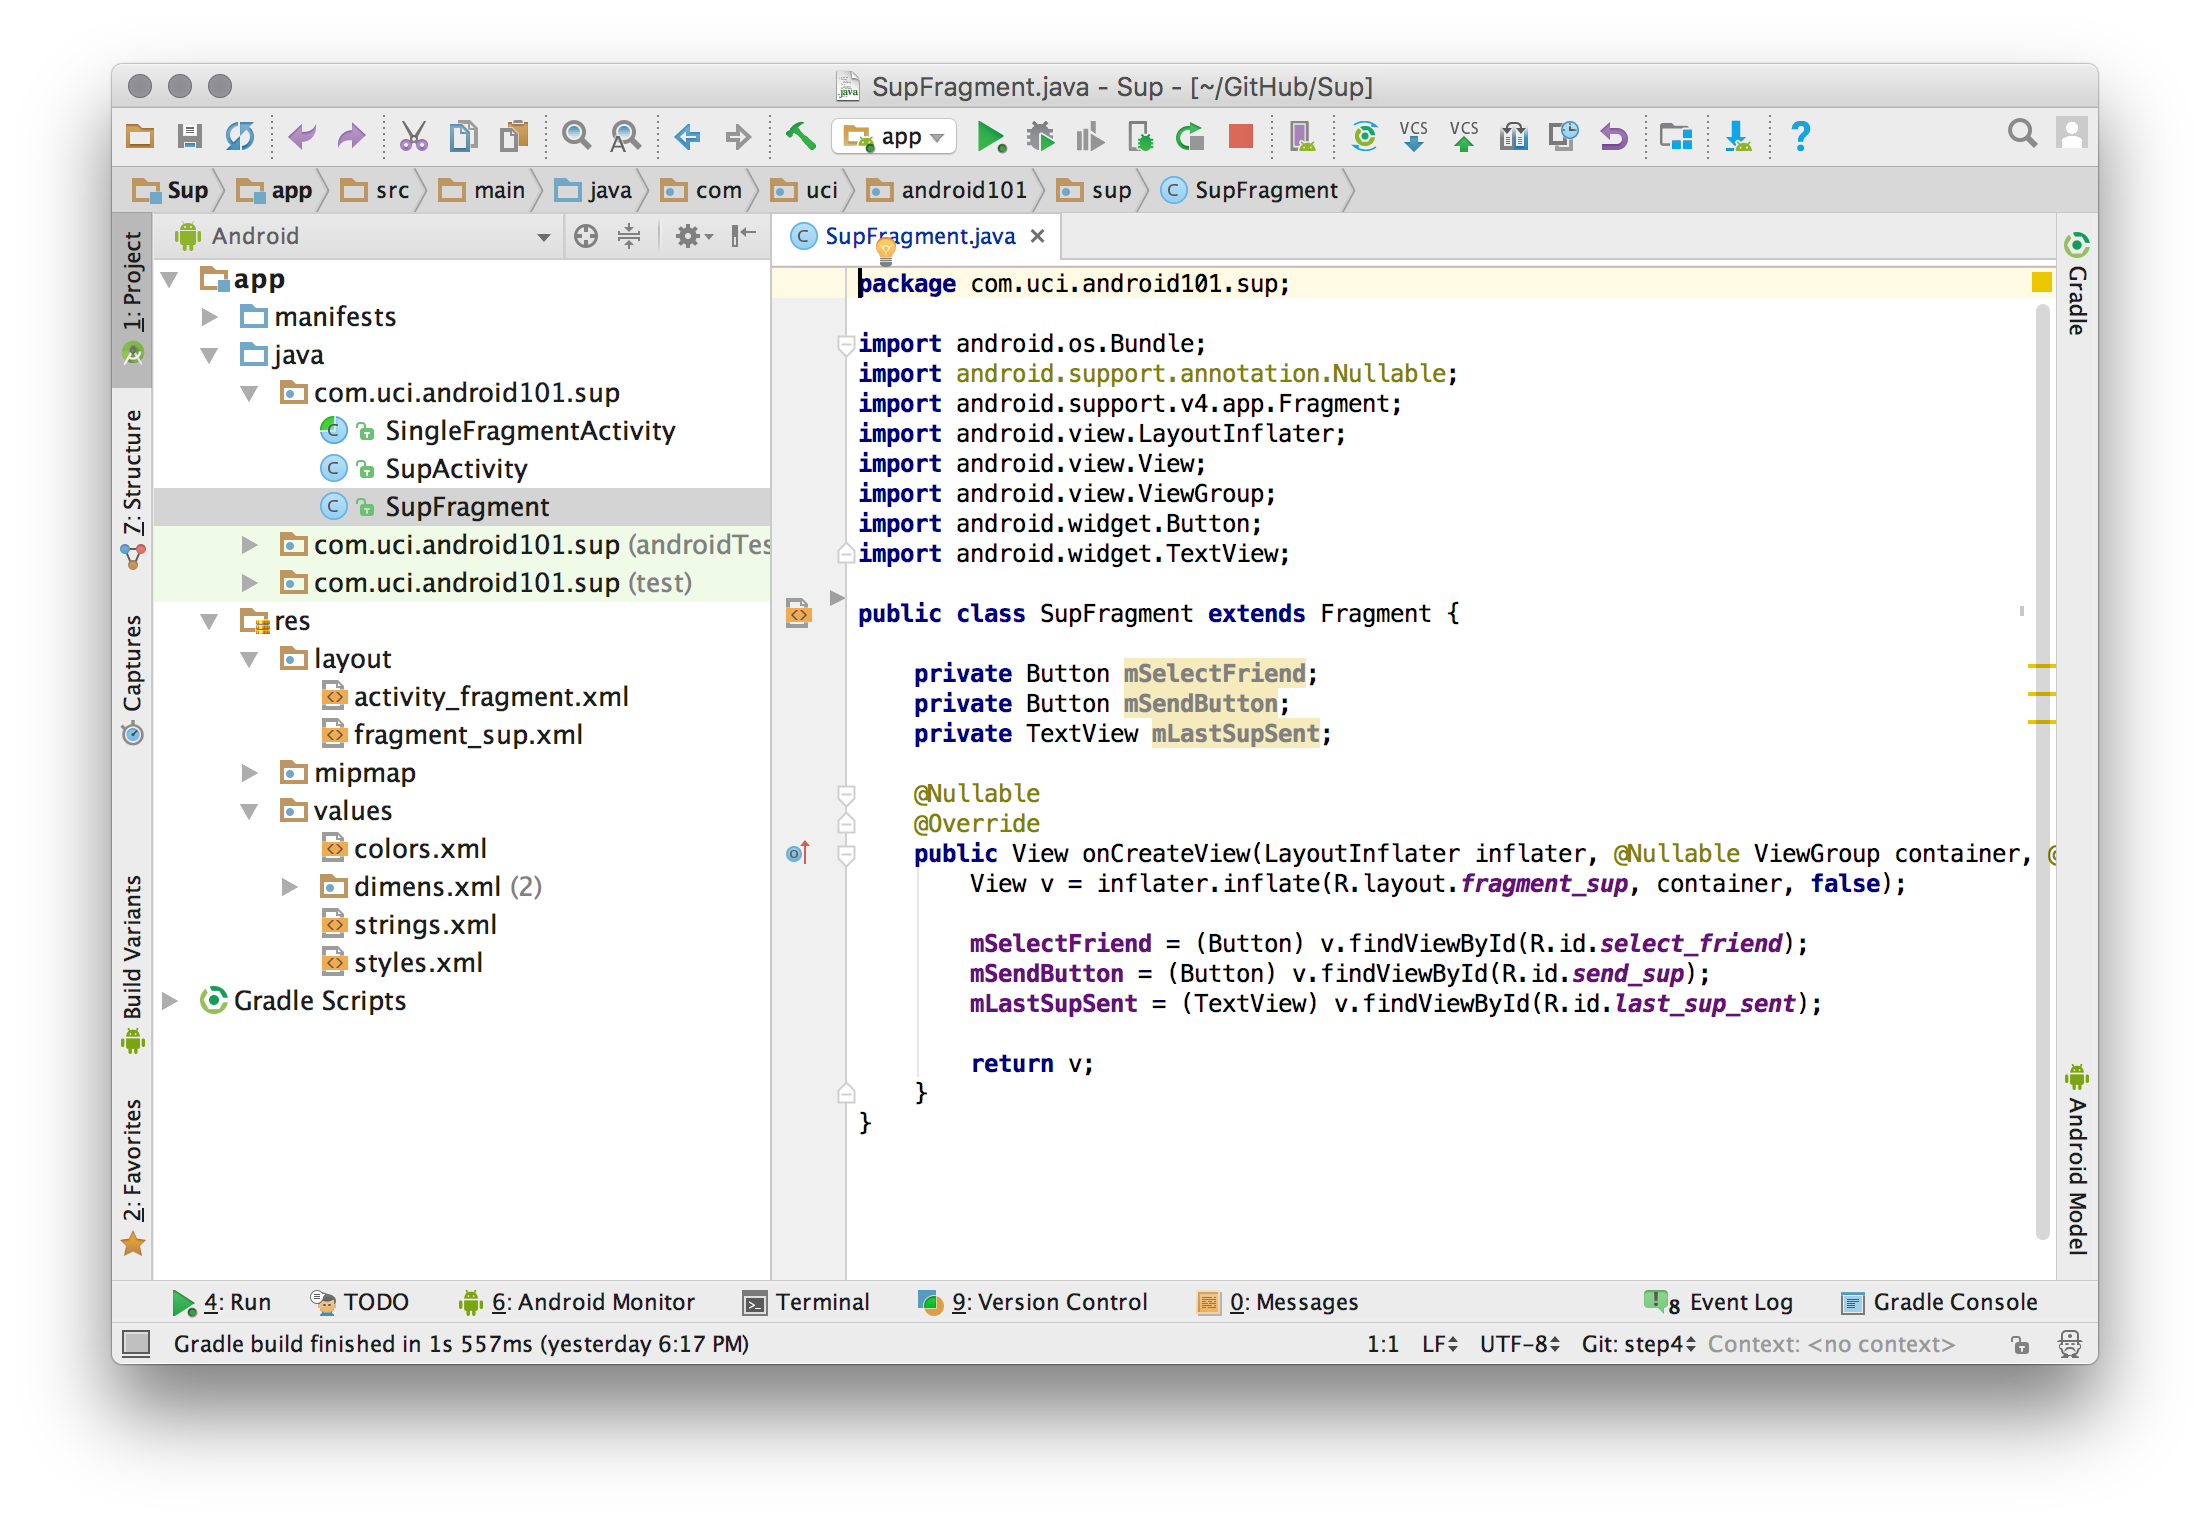
At this point, your code should look like the following:
Manage the Activity Lifecycle
Now, we'll use an activity to manage SupFragment's lifecycle.
We don't need to add anything specific to SupActivity in order to add a fragment to the activity. Therefore, we will create an abstract subclass of Activity that adds a fragment to itself, then subclass it in SupActivity.
Go to the /java/com/uci/android101/sup/ directory in the Project pane. Right click this and select New > Java Class.
Name the class SingleFragmentActivity. Choose android.support.v7.app.AppCompatActivity as the superclass, and in Modifiers, select Abstract.
Now, in SingleFragmentActivity.java, add the following:
@Override
public void onCreate(Bundle savedInstanceState) {
super.onCreate(savedInstanceState);
	setContentView(R.layout.activity_fragment);
    FragmentManager fm = getSupportFragmentManager();
    Fragment fragment = fm.findFragmentById(R.id.fragment_container);
    if (fragment == null) {
        fragment = createFragment();
        fm.beginTransaction().add(R.id.fragment_container, fragment).commit();
    }
}
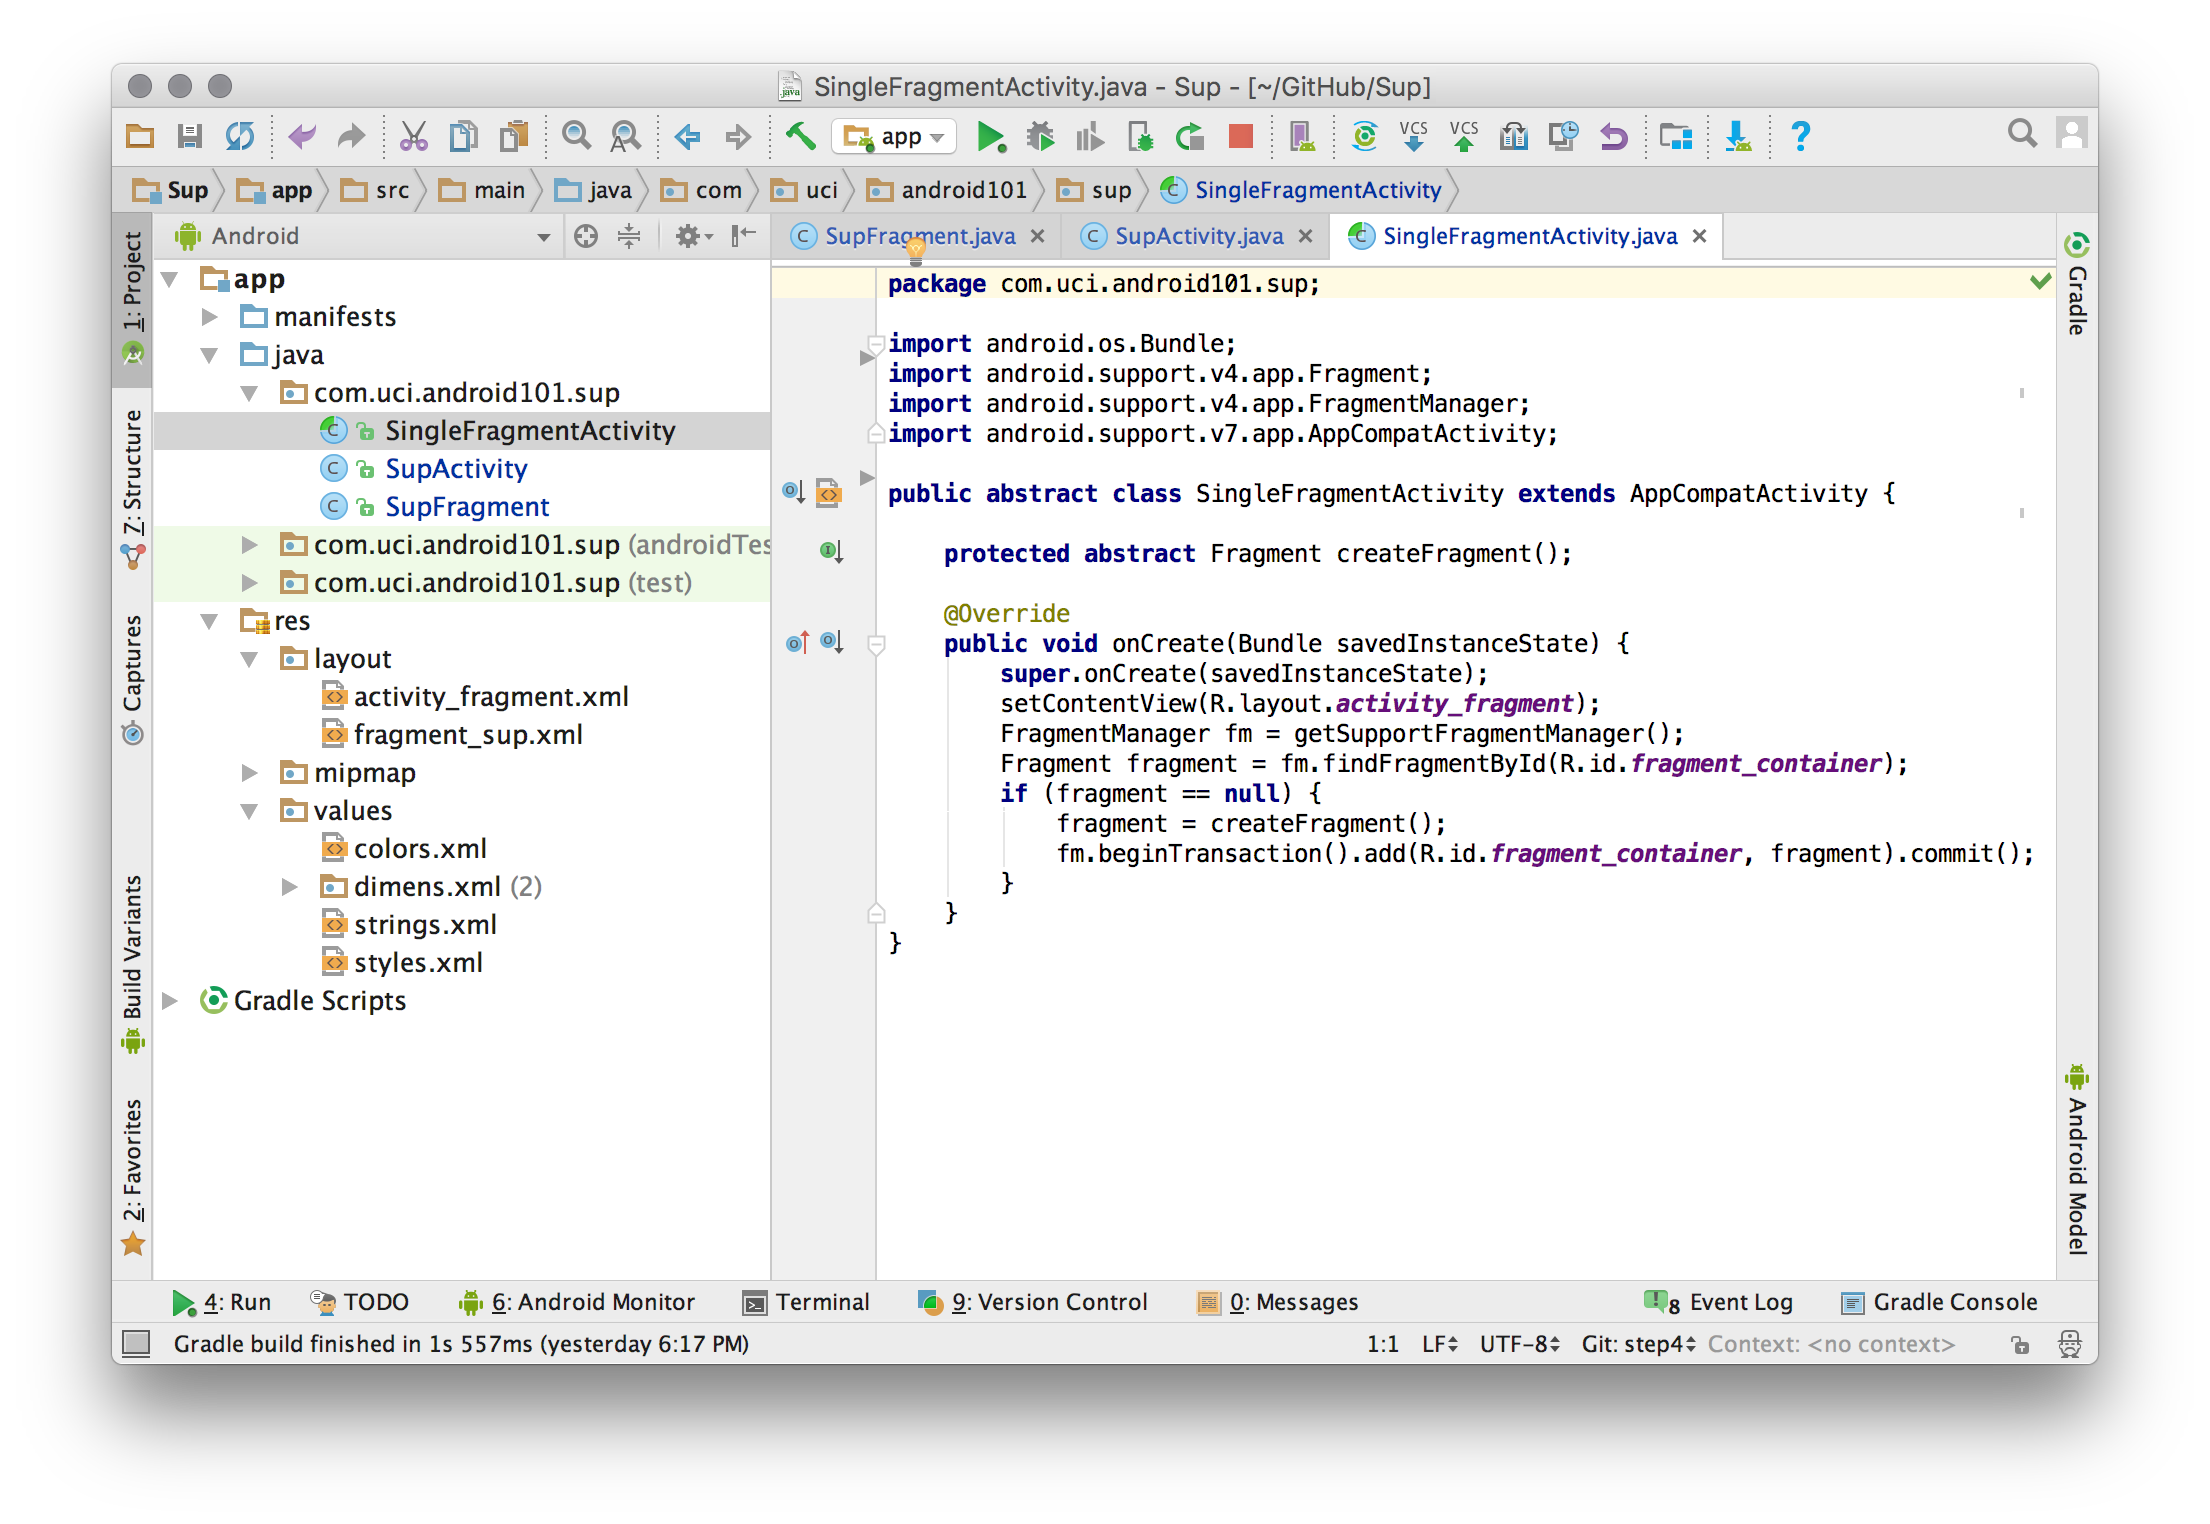
Make sure your code looks like this:
Again, you'll need to import the necessary classes using alt+enter, as we did before. If you notice, we still have an error - the resource ID referenced in setContentView(). We're actually just going to rename activity_sup.xml to activity_fragment.xml because it just contains a container for one fragment. To rename, right click activity_sup.xml in the left pane, then select Refactor > Rename, and rename it to activity_fragment.xml.
Extend from the Superclass
Now return to SupActivity.java and change the superclass to SingleFragmentActivity. Also, change onCreate() to public and implement the missing method by hovering over the method name and hit alt+enter > Implement methods. This will bring up a dialog, and here, select createFragment():Fragment and click OK.
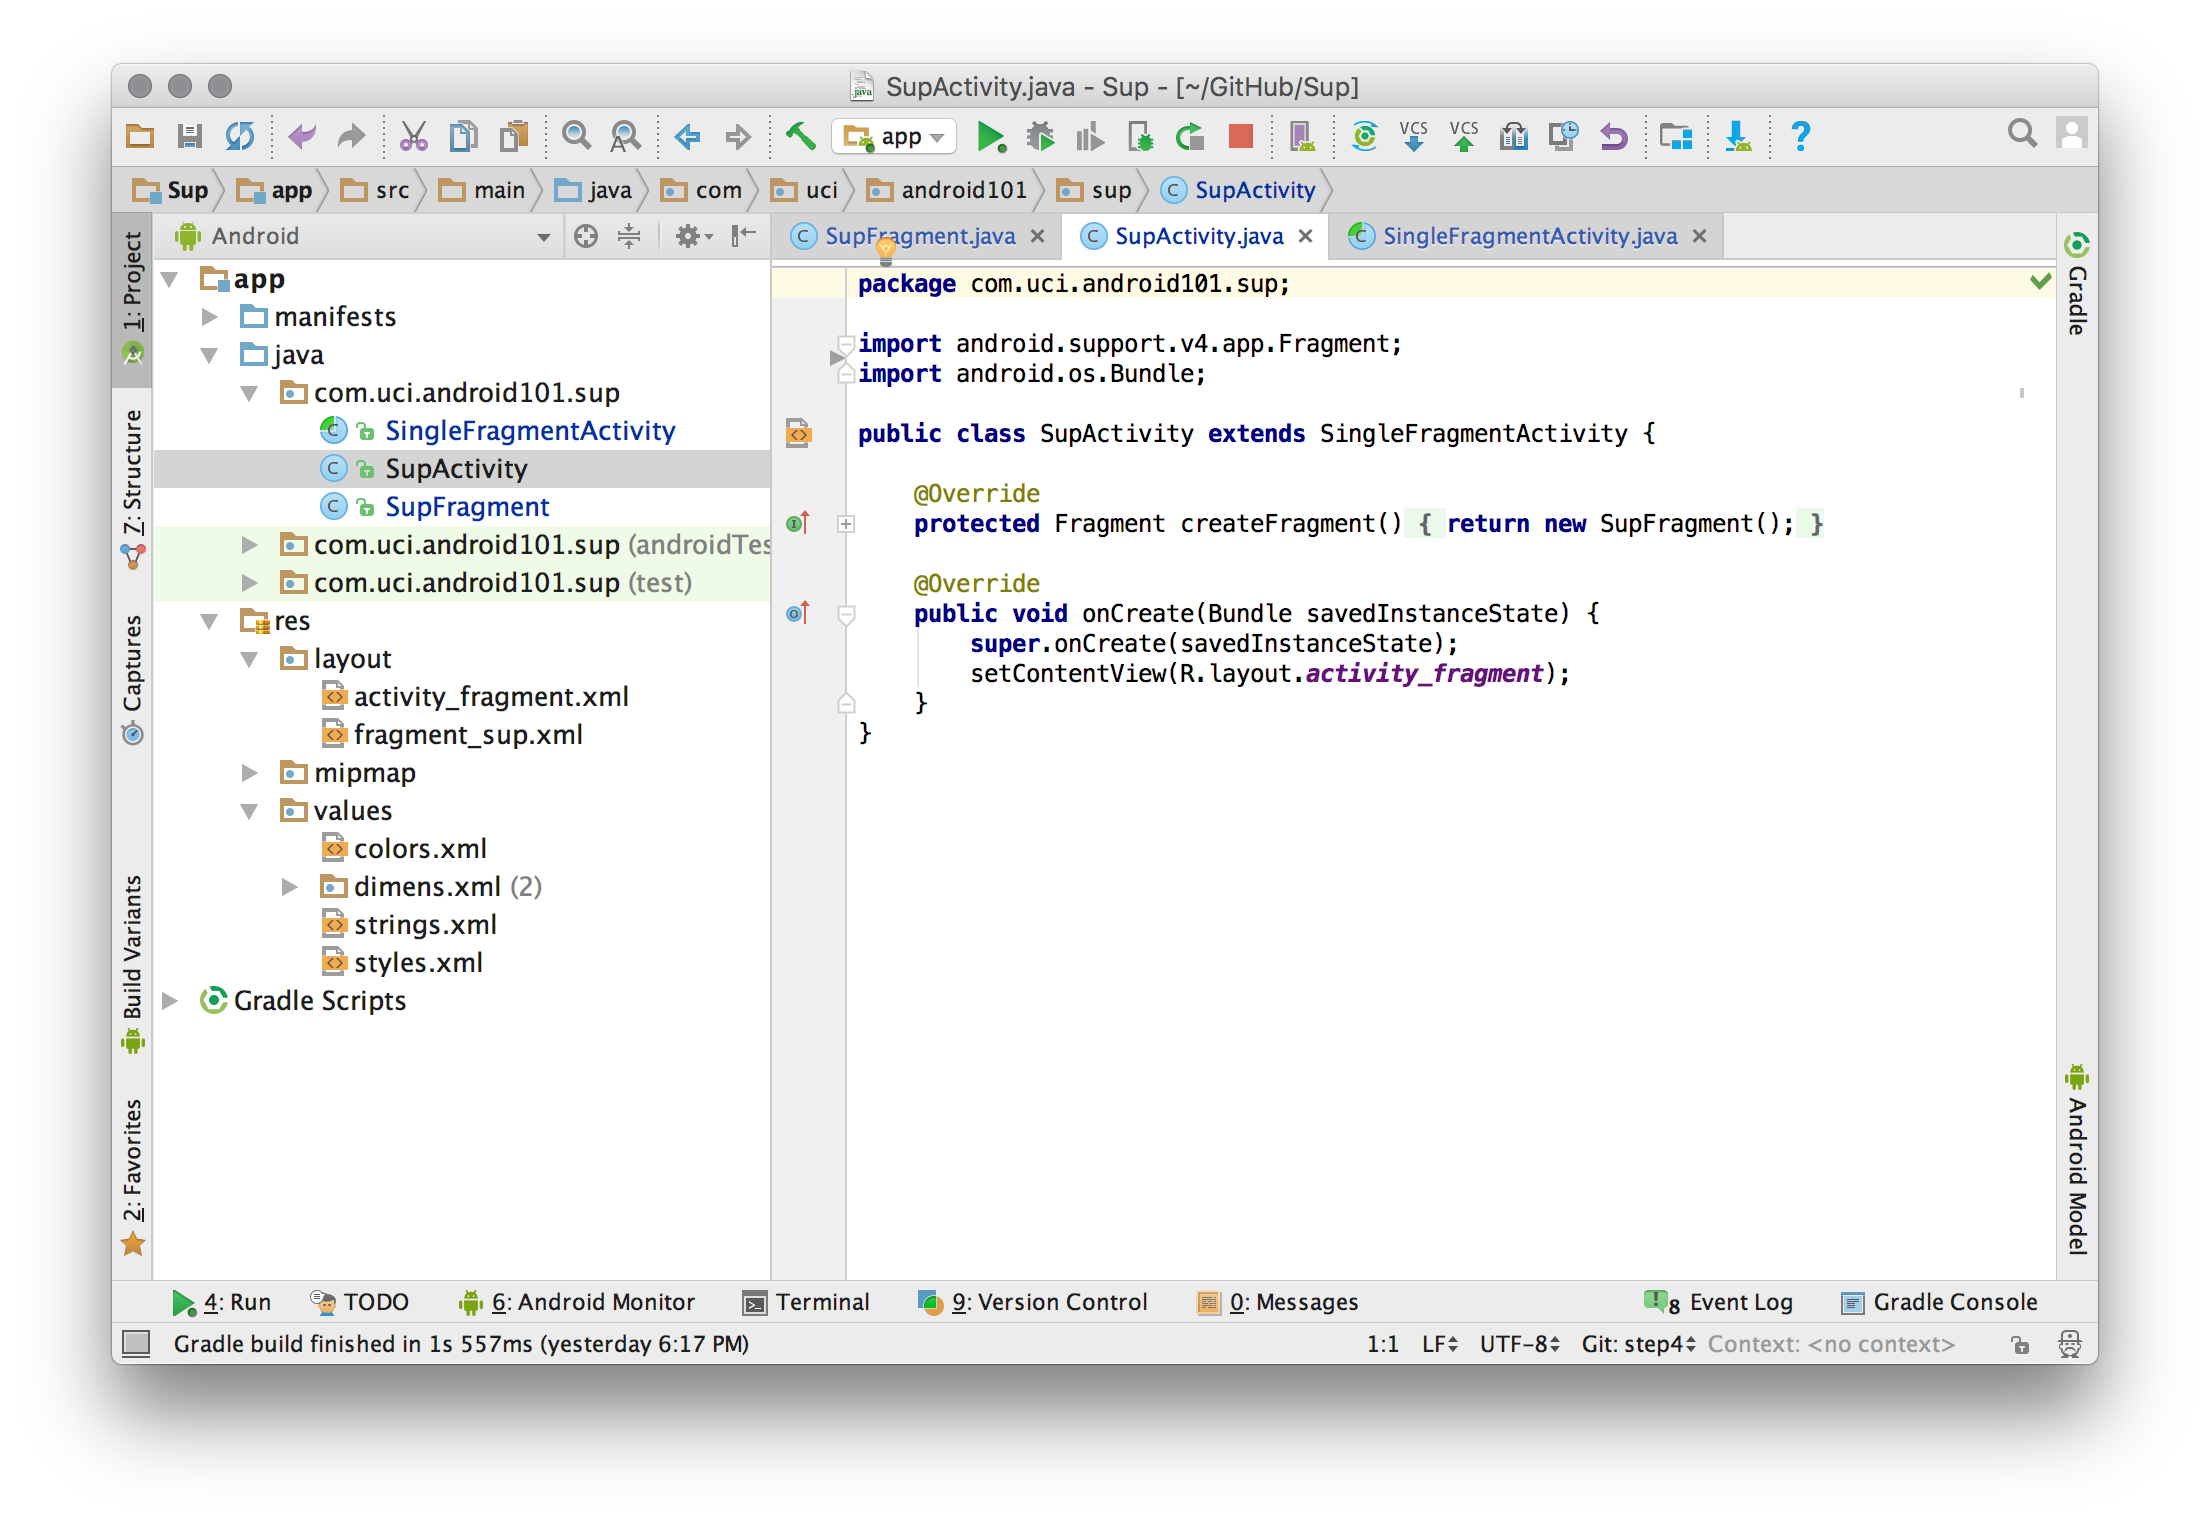
Now, ensure SupActivity.java looks as below:
Run Your App
Press the green play button. Your app should look like this:
